This weekend I decided to make a last-minute St. Patrick’s Day shirt for my daughter. Last November I followed
One More Moore’s tutorial and made a turkey handprint shirt for each of the kids for Thanksgiving. It was the first time I’d done a reverse appliqué and I loved how it turned out. This time I figured I’d just wing it and see what came out. Here’s what I ended up with –
Materials:
- Plain T-Shirt - I pick these up anytime I see them on sale or clearance. And, if you're looking very carefully, you'll notice I actually used a different one with my shirt. I decided to place the applique a little higher and went with a shirt without any gathers at the neck.
- Fabric - You could use just a small piece. I used about half of this fat quarter since I also added the ruffle.
- Lining fabric – optional - I used plain flannel just to provide a softer backing than the appliqué fabric.)
- Thread - I prefer a thread that will coordinate with the fabric and stand out against the shirt fabric since it will basically outline your applique.
- Shamrock Pattern - I used Skip to My Lou’s pattern. It has three sizes which is great! I used the smallest for mine.
- Basic sewing supplies – scissors, pins, sewing machine, bobbin, etc.
Instructions:
1. Print your
pattern and cut out the shamrock shape that will work best for your shirt. In my case, I was using a 24 month shirt and chose the smallest shamrock from the pattern. For the purpose of the photos, I chose to trace the shamrock onto cardstock, but you can easily use the plain printer paper pattern.
2. Determine the placement of the shamrock and pin your pattern to the front of the shirt.
3. Turn your shirt inside out and pin your fabric to the inside of the shirt. Your patterned fabric should be placed patterned side down onto the inside of the shirt. I placed flannel on top, too. You could skip this part, but I like that it is softer against the skin.
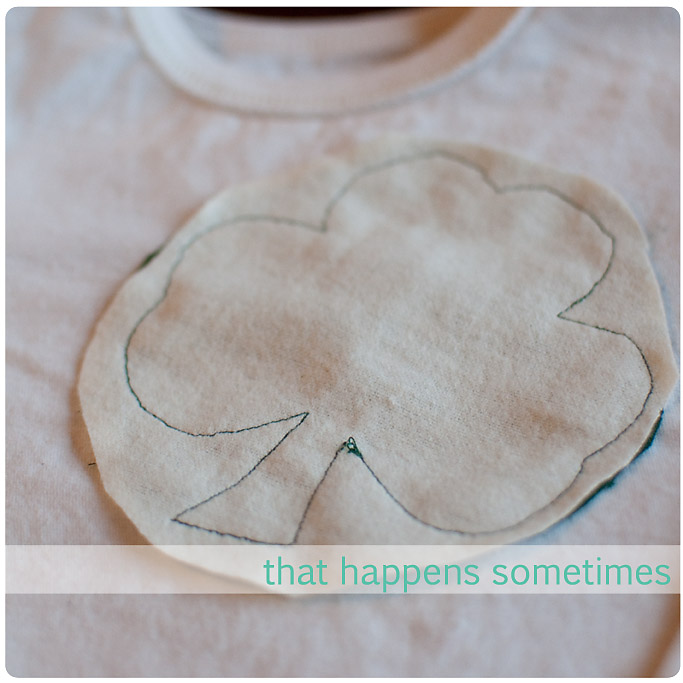
4. Turn the shirt right side out again and carefully sew around your pattern. Using a shorter stitch length will help make the turns a little less noticeable.
5. Remove your pattern and admire your handiwork!
6. Now – let’s show off the pretty fabric you chose. Pull the t-shirt fabric slightly so that it is not touching the other fabric below. Carefully cut a hole with your scissors.
7. Using the hole as a starting point, cut around the entire shape leaving about a quarter of an inch of the t-shirt remaining.
8. If you’re in a hurry or happy with it as it is, you can call it quits here. Note – the edge that you left will look better after you wash the shirt!
9. If you wish, you can turn the shirt inside out and cut away some of the excess fabric. When I do so, I cut the patterned fabric smaller than the flannel so that the edges are soft.

10. Optional step - Add a ruffle to the bottom of the shirt. At this point, I decided to be daring and add ruffles to the bottom. There are no photos of this part because, well - I'm NOT a ruffle expert. In fact, I stink at ruffles. We have a little love/hate relationship, I’m afraid. I love the look of them, I hate to create them! If I use a long stitch and try to pull one thread – I break it every inch or so. I bought a “universal” ruffler foot for my machine – it didn’t fit. So, until I get a new sewing machine, I’m still doing ruffles the old fashioned way (and not documenting the process with photos). If you're just dying to know - I cut about 2 inch strips from my fabric until about 2 1/2 times the width of the shirt - totally eyeballed it. I sewed these together at the narrow ends to create one long strip, ironed it in half, and then sewed the long edges with the right sides together. I pulled it right side out and then did an old fashioned hand gathering stitch. I folded in the ends and sewed them shut by hand as well. I then pinned the ruffle to the shirt and sewed it with my machine. Now, if you look carefully at the finished product, you’ll notice the incredibly uneven hand stitching. But – hey – THAT HAPPENS SOMETIMES!
Finally – try the finished project on your little one!
Ok - so that is it - my first "tutorial" post. Let me know what you think! Was it helpful? Too many photos/steps or not enough? Is this a project you'd try?